
NetPilot is a connector in the Claude directory. Connect it once, and the chat you already work in can build a real network lab: Claude designs the topology, writes the router configurations, deploys real Cisco IOS on your own lab VM, and checks the result. You then open the lab viewer and type the show commands yourself. This tutorial follows the recording above click by click: four Cisco IOS routers, three OSPF areas, two Linux hosts, one prompt.
The same connector works in ChatGPT and Meta Muse. The connect steps for all three assistants are on the connection guide.
Step 1: Find NetPilot in the Claude connector directory
Start in an empty Claude chat with the cursor in the composer. Open the plus menu, choose Connectors, then Add connector and Browse. The directory opens.
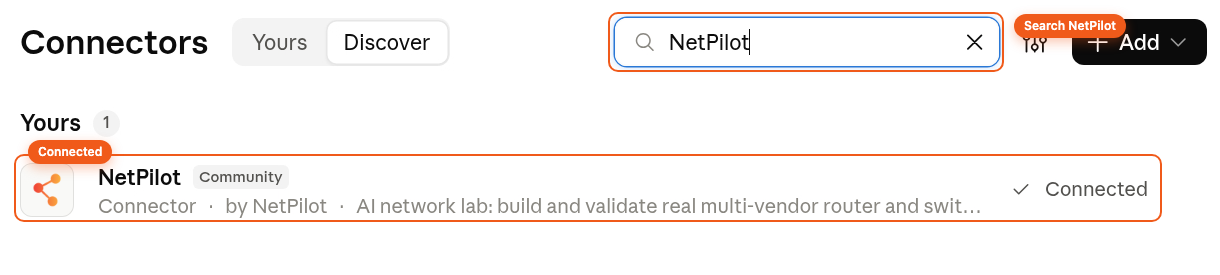
Search for NetPilot. The listing shows up under Yours once it is connected, or under Discover before that.
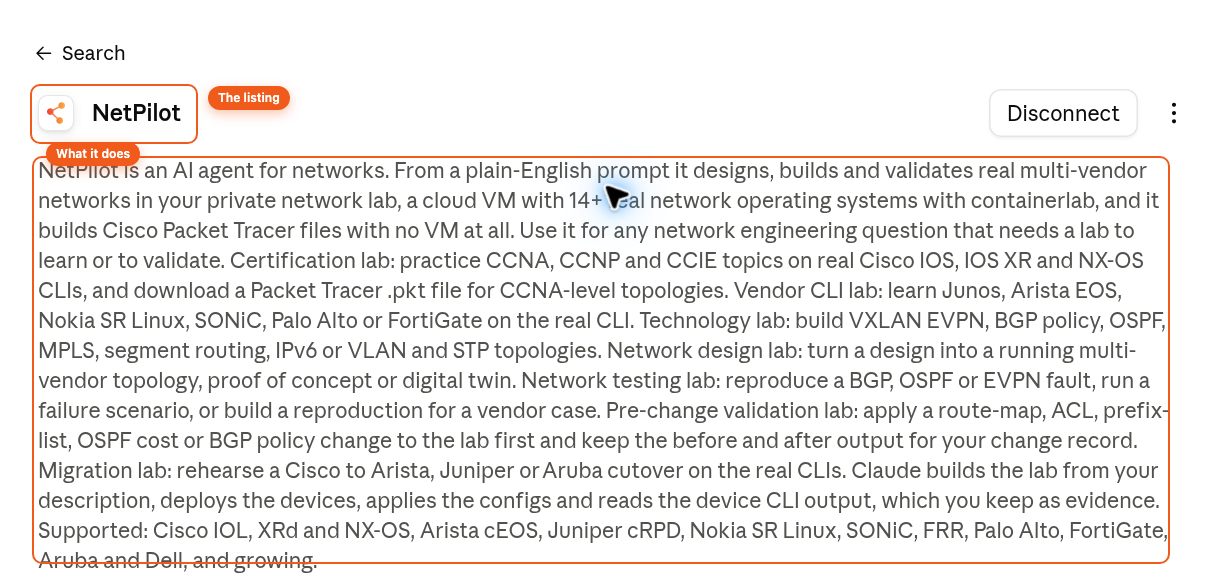
Open the listing. It names every lab job NetPilot builds, from certification labs on Cisco IOS, IOS XR and NX-OS to vendor CLI labs on Junos, Arista EOS, Nokia SR Linux, SONiC, Palo Alto and FortiGate. Click Connect and sign in with your NetPilot account. The account in the recording was already connected, which is why its button reads Disconnect.
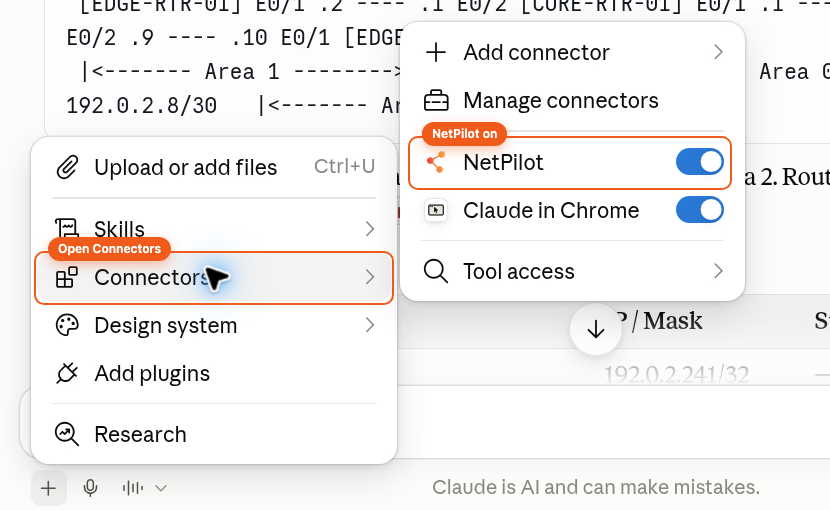
Back in the chat, open the plus menu, choose Connectors, and switch NetPilot on. That is the whole setup.
Step 2: Ask for the lab in one prompt
Describe the outcome, not the commands. This is the prompt from the recording, typed exactly:
Build me a multi-area OSPF lab on Cisco IOS routers: CORE-RTR-01 and CORE-RTR-02 in area 0, EDGE-RTR-01 in area 1 behind CORE-RTR-01, EDGE-RTR-02 in area 2 behind CORE-RTR-02, one Linux host behind each edge router, RFC 5737 addressing. Show me the topology and the IP plan as a table, deploy it on my lab VM, and tell me when every OSPF neighbor is FULL and the two hosts can ping each other.
Claude answers with the topology sketch and the IP plan before it builds anything, so you can check the design first. The core routers form the area 0 backbone, each edge router sits in its own area, and the host networks hang off the edges.
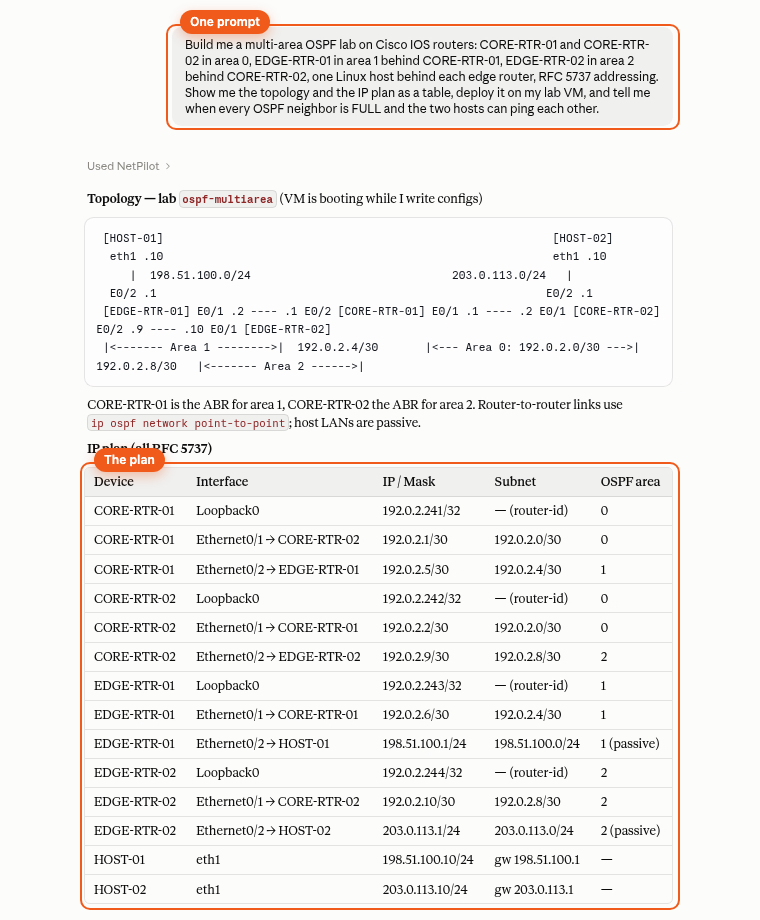
The plan from the recording, lab ospf-multiarea-02:
| Device | Role | Links | Loopback |
|---|---|---|---|
| CORE-RTR-01 | Area 0, ABR for area 1 | 192.0.2.0/30 to CORE-RTR-02, 192.0.2.4/30 to EDGE-RTR-01 | 192.0.2.241/32 |
| CORE-RTR-02 | Area 0, ABR for area 2 | 192.0.2.0/30 to CORE-RTR-01, 192.0.2.8/30 to EDGE-RTR-02 | 192.0.2.242/32 |
| EDGE-RTR-01 | Area 1 | 192.0.2.4/30 to the core, 198.51.100.0/24 to HOST-01 | 192.0.2.243/32 |
| EDGE-RTR-02 | Area 2 | 192.0.2.8/30 to the core, 203.0.113.0/24 to HOST-02 | 192.0.2.244/32 |
Router links run as OSPF point-to-point, the host LANs are passive interfaces, and every address comes from the RFC 5737 documentation ranges.
Copy-paste ready: the multi-area OSPF prompt in the example prompts, with the variations to try next.
Step 3: What Claude is doing while you wait
Every action shows up as a NetPilot tool call in the chat, so the build is readable even while it runs. In the recording Claude:
- Checked the lab VM and started it. A cold VM takes a minute or two, and this is most of the wait.
- Read the device type guides for the Cisco IOS router and the Linux endpoint.
- Wrote the topology and the four router configurations.
- Deployed all six devices with containerlab on the VM.
- Waited for the routers to boot, then checked OSPF neighbors and routes on each one and ran pings between the hosts.
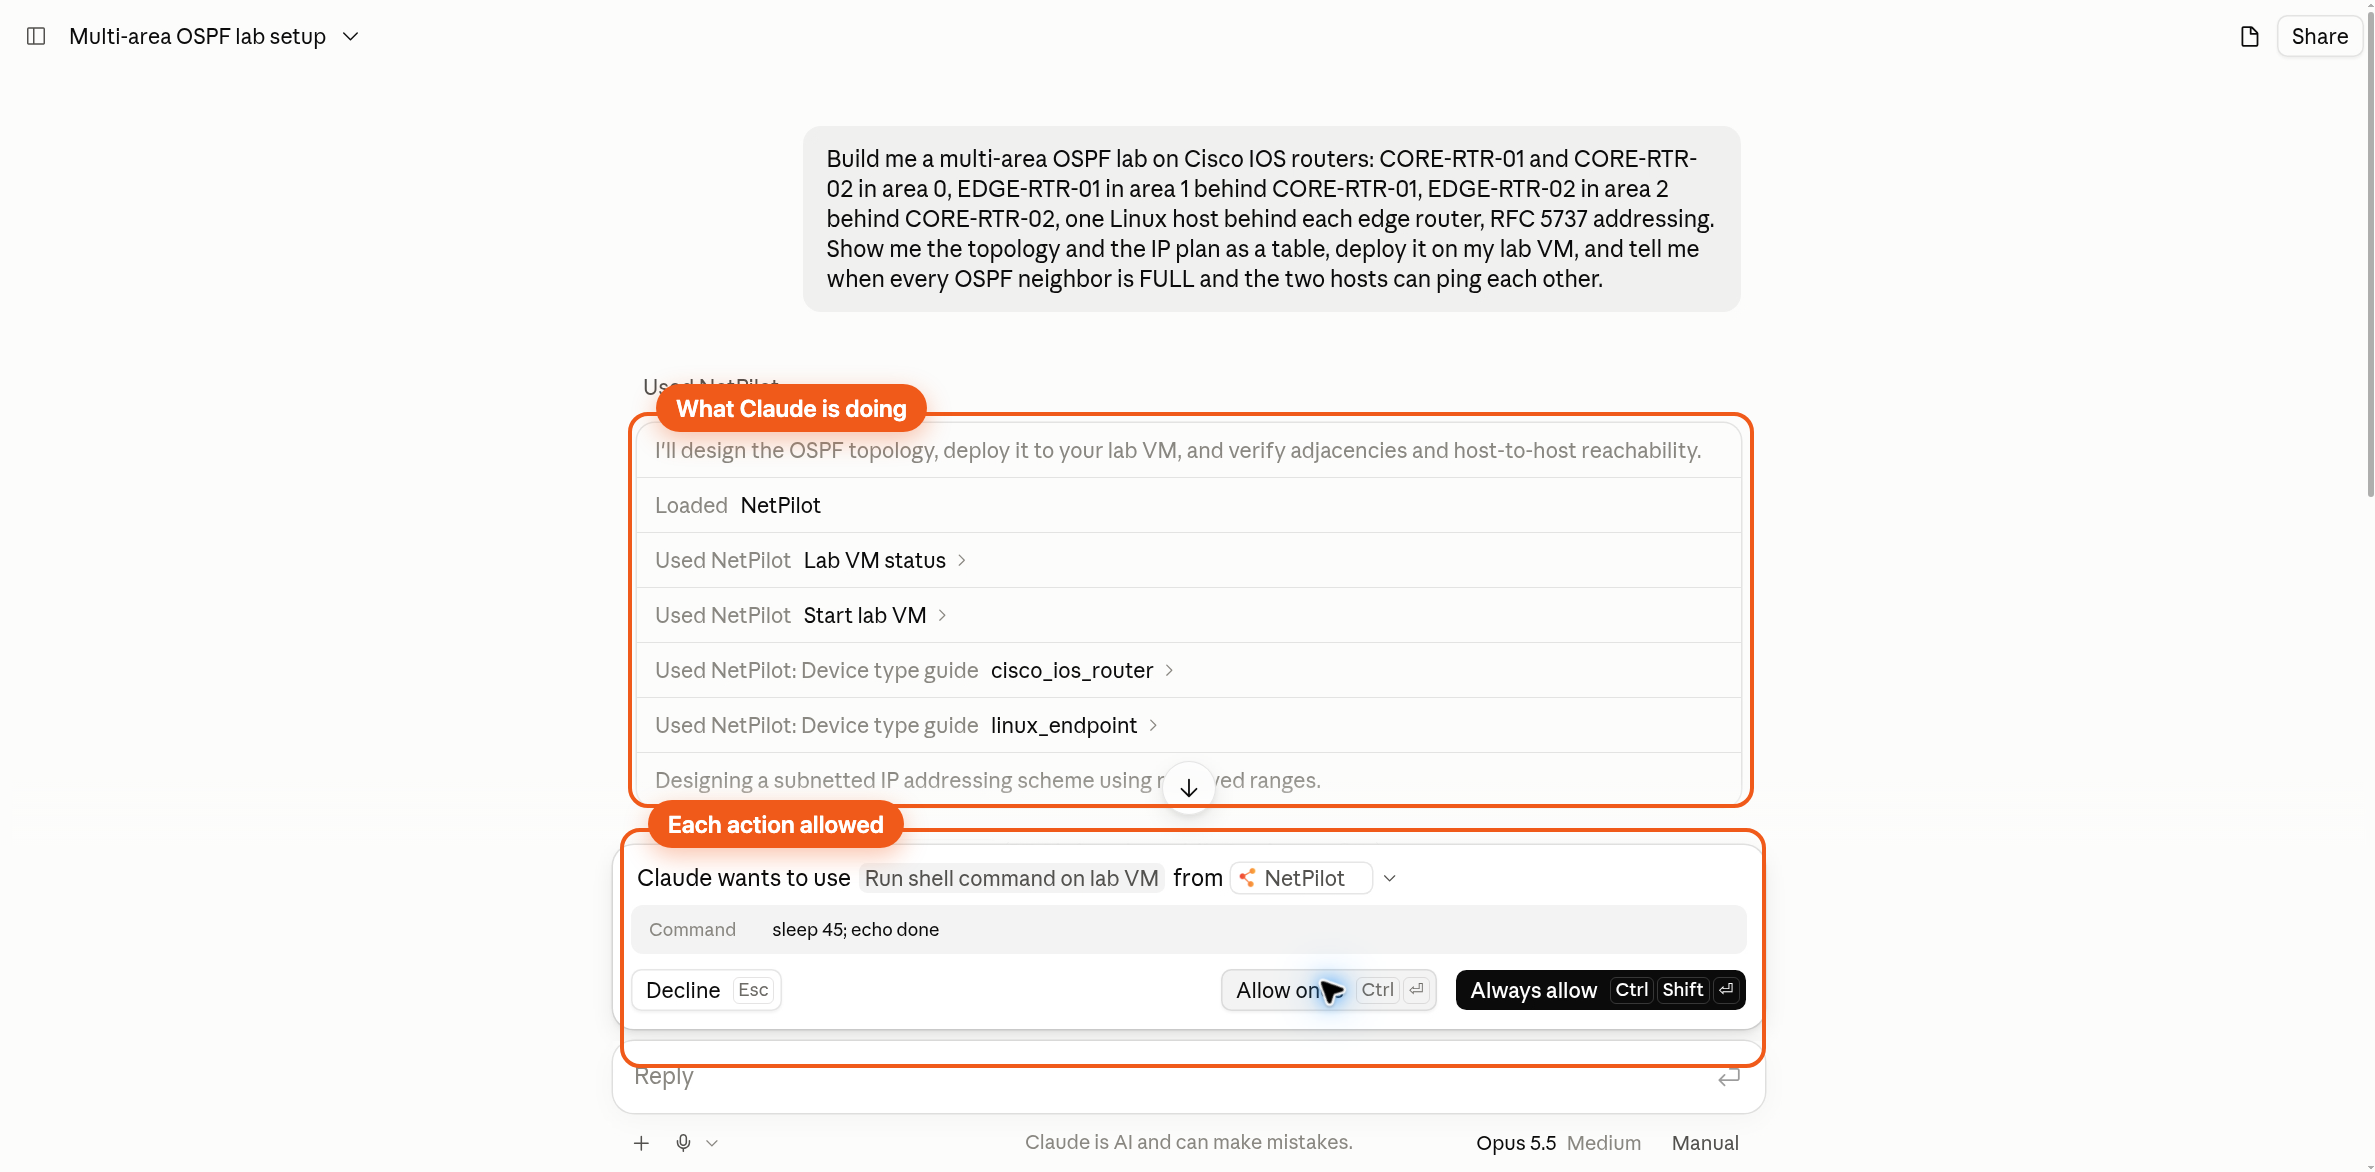
Claude asks before it runs a shell command on your VM. Allow each one for the run, or choose Always allow. When the build is done, Claude reports the state it found: FULL on every adjacency, and 4 of 4 replies between the hosts in each direction.
Direct CLI is always available too. Everything Claude ran, you can run yourself. That is the next step.
Step 4: Open the lab viewer and verify on the real CLI
Claude returns a lab viewer link with the report. The viewer shows the running topology with a console per device. Select CORE-RTR-01 and open its terminal. This is the router's own IOS command line.
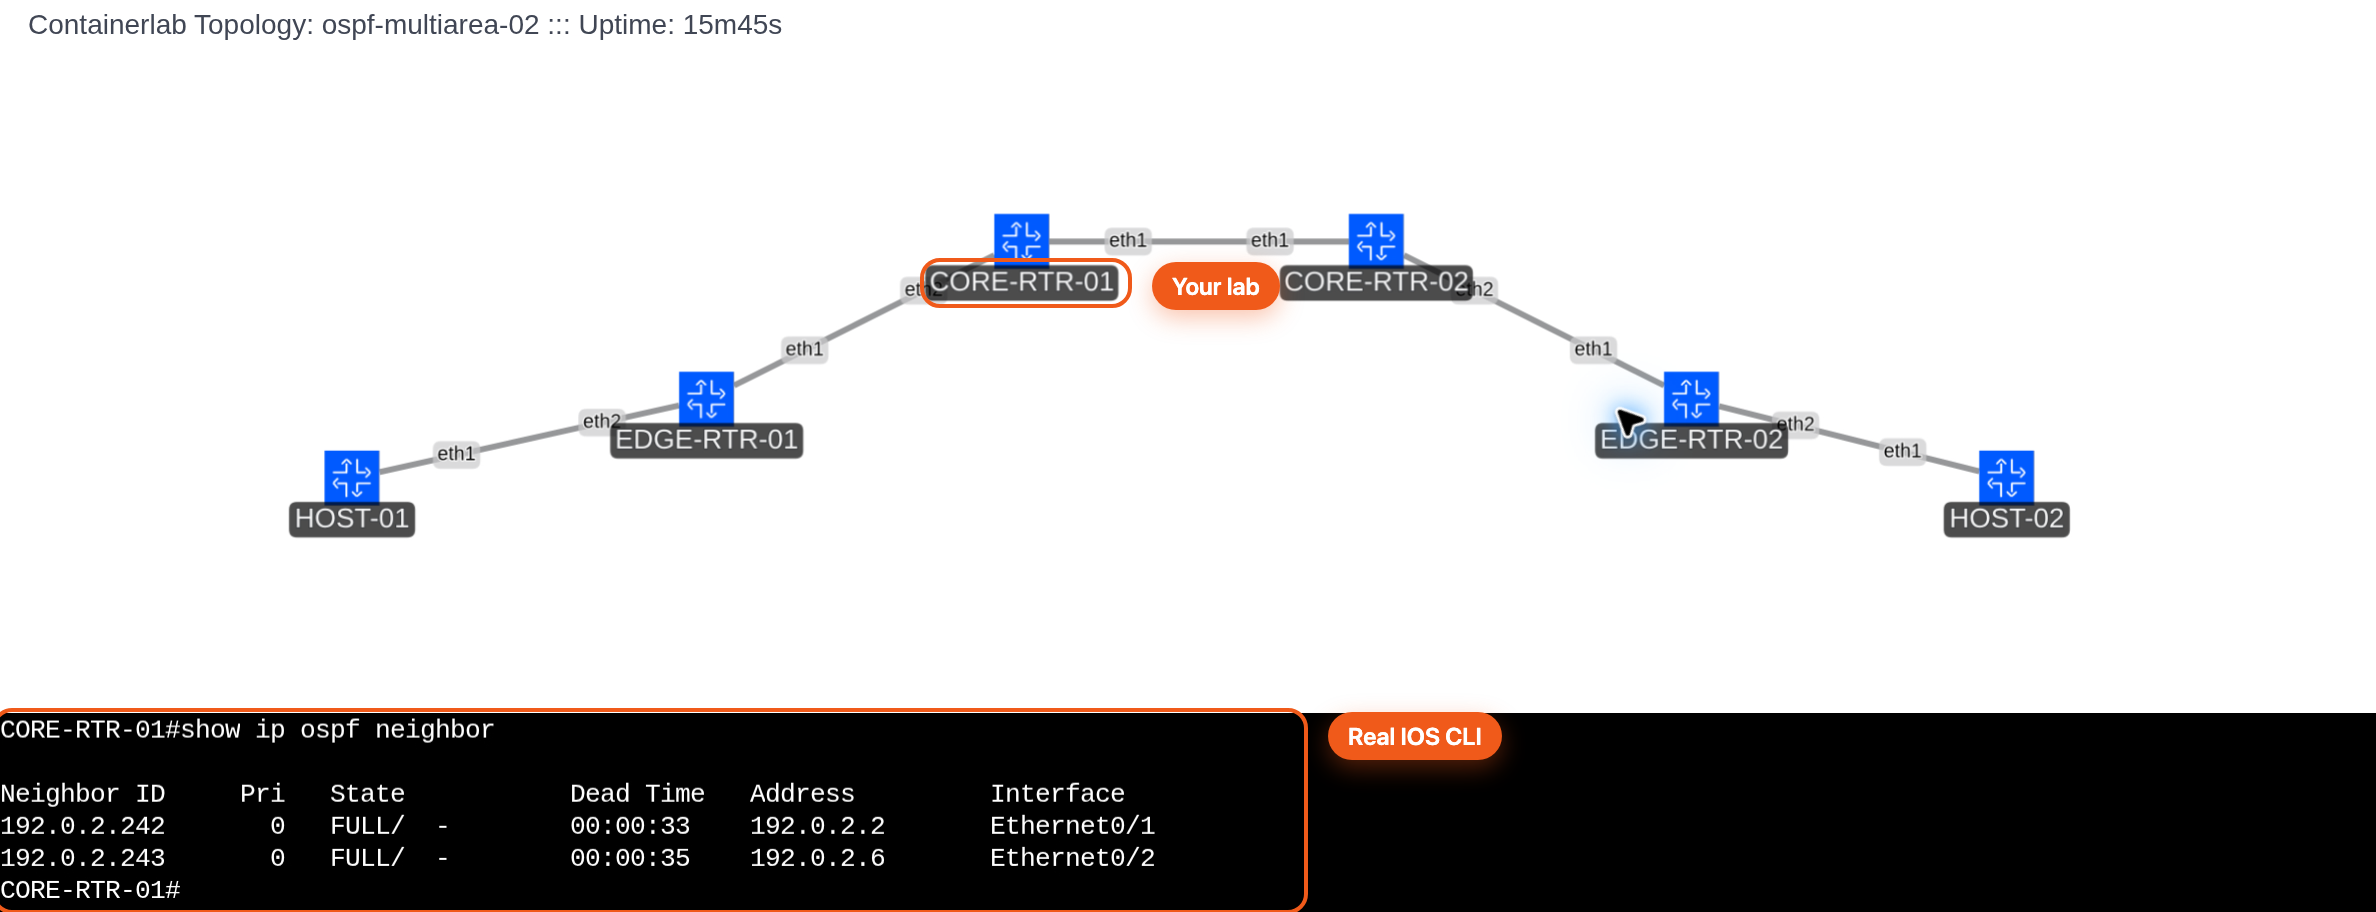
Three commands tell you the routing state is real:
CORE-RTR-01#show ip ospf neighbor
CORE-RTR-01#show ip route ospf
CORE-RTR-01#show ip ospf border-routers
The neighbor table shows two FULL adjacencies, one toward the other core router and one toward EDGE-RTR-01. The route table marks intra-area and inter-area routes with different codes. The border-router view identifies CORE-RTR-02 as an ABR reachable through area 0.
Switch to EDGE-RTR-01. Its single neighbor is FULL, and the route to the remote host network is marked O IA, learned through the backbone:
EDGE-RTR-01#show ip route ospf
O IA  203.0.113.0/24 [110/40] via 192.0.2.5, 00:13:22, Ethernet0/1
EDGE-RTR-01#ping 203.0.113.10
Success rate is 100 percent (5/5), round-trip min/avg/max = 1/1/1 ms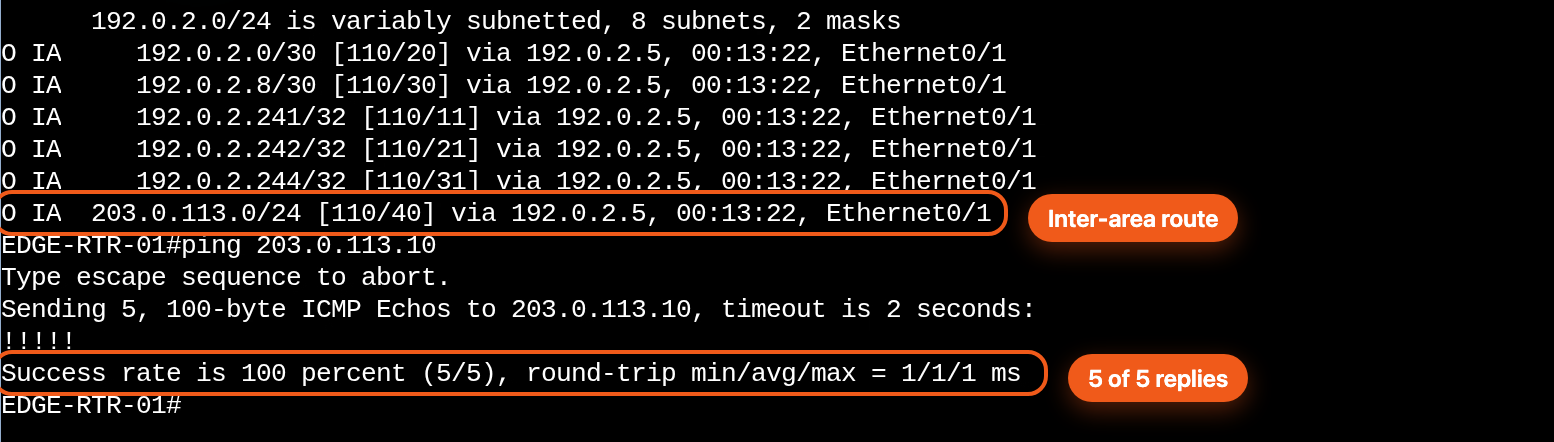
That ping travels from area 1 through area 0 into area 2, which is the point of a multi-area design. The separate host tests Claude ran cover the host-to-host path.
Watch the Short: the build beat in 45 seconds, at youtube.com/shorts/p9g07mFqZSA.
Step 5: Keep the files, stop the VM
Ask Claude for the topology and the running configuration of every router as downloadable files, and keep them next to the video. Then stop the lab VM from the chat. The lab stays on the VM for your next session.
The files from this recording, the containerlab topology and the four sanitized router configurations, are published with this post under the lab files below.
Lab files from the recording
- ospf-multiarea-02.clab.yml: six nodes and five links
- CORE-RTR-01-running.cfg, CORE-RTR-02-running.cfg, EDGE-RTR-01-running.cfg, EDGE-RTR-02-running.cfg
- PROVENANCE.md: how the files were taken from the session and what was changed
Each configuration has its one credential line masked and its startup-config reference pointed at the file beside it. The Cisco image is not included: supply your own, as the supported devices page describes.
FAQ
How do I connect NetPilot in Claude?
In a Claude chat, open the plus menu in the composer, choose Connectors, then Add connector and Browse. Search for NetPilot, open the listing and click Connect, then sign in with your NetPilot account. Back in the chat, open Connectors again and switch NetPilot on. The same connector works in ChatGPT and Meta Muse, and the connect steps for all three are on the connection guide.
What does Claude do with NetPilot when I ask for a lab?
Claude starts your own lab VM, reads the device guidance for the routers you named, designs the topology and the IP plan, writes every router configuration, deploys the devices with containerlab, then logs into the routers to check neighbors and routes and pings between the hosts. Each action shows as a NetPilot tool call in the chat.
Is the lab real Cisco IOS or a simulation?
Real Cisco IOS. The routers run the Cisco IOL image you supply once to your lab VM, so every show command, every route code and every ping is the operating system's own output. Nothing is installed on your machine.
Can I use the lab viewer to type commands myself?
Yes. When the lab is up, Claude returns a lab viewer link. The viewer shows the running topology with a console per device, where you type show ip ospf neighbor, show ip route ospf or a ping on the real CLI.
Do I need to install anything to follow this tutorial?
No local install. You need a Claude account that can hold a connector, a NetPilot account, and a Cisco IOS image uploaded once to your lab VM. The supported devices page lists which operating systems are preloaded and which you bring.
Build your own from the chat
Open Claude, connect NetPilot from the directory, and describe the lab you want. Start with the prompt above and change the areas, the vendors or the routing protocol. The connect steps for Claude, ChatGPT and Meta Muse are on the connection guide, and the NetPilot labs playlist has the other episodes.
More labs on real Cisco IOS: the Cisco virtual lab hub, the CCNA practice lab and the CCNP practice lab pages.
Discuss on GitHub: the community announcement takes questions about the connector and the lab. The episode is also on X and LinkedIn.
Sign in to NetPilot to set up your lab VM before you connect.